
Maintaining a tile floor in pristine condition can often feel like an uphill battle against the daily accumulation of dust, footprints, and kitchen spills. However, achieving a professional level of cleanliness does not have to be an exhausting chore. Whether you are managing the high traffic of ceramic tile floors in a busy kitchen or trying to preserve the spa like atmosphere of porcelain tile floors in a master bathroom, the specific cleaning methods you employ will dictate your success. This comprehensive guide serves as an ultimate resource for floor cleaning. We will explore expert techniques for removing stubborn stains, detailed strategies for maintaining grout, and the science behind choosing the right cleaning product to ensure your tile floor stays looking its absolute best for decades.
1. What is the Best Way to Clean Tile Floors Daily?
When considering the long term health of your flooring, regular maintenance is the most effective strategy. The primary goal of daily care is to prevent abrasive debris from settling into the microscopic pores of the surface. Daily intervention focuses on the removal of loose dirt before it is ground into the floor tile by constant foot traffic. If left unattended, these small particles act like sandpaper, slowly wearing down the protective glaze of your ceramic or porcelain.
A simple sweep or vacuum session every evening can prevent the buildup of grime that eventually makes a floor look dingy and aged. If you prefer using a broom, it is vital to select one with soft, synthetic bristles. Stiff or natural straw brooms can sometimes be too abrasive for certain high gloss finishes. Conversely, a vacuum cleaner set to a hard floor mode is often superior to a broom. Modern vacuums are designed to suck up fine dust and allergens from deep within the grout lines where a broom might simply skip over.
To keep the entire floor truly spotless, immediate action is required for spills. Allowing liquids to sit on ceramic surfaces can lead to the formation of a sticky residue. This residue acts as a magnet for more dirt, creating a cycle of filth that is difficult to break. A quick wipe with a microfiber cloth or a damp sponge is usually sufficient to neutralize a fresh spill. By remaining proactive with these minor tasks, you ensure your tile floor remains easy to maintain and aesthetically pleasing.

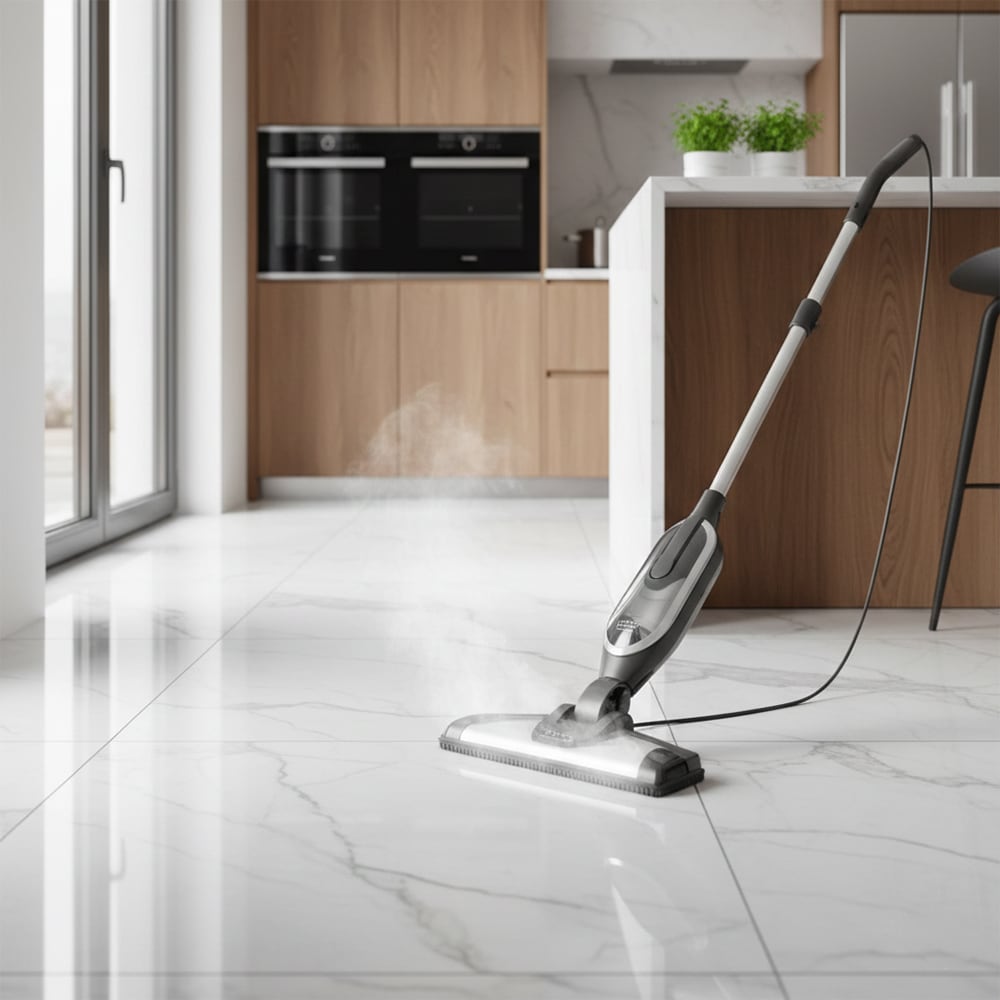
2. Is a Steam Mop Safe for Ceramic Tile?
The rise of the steam mop has revolutionized home sanitation because it utilizes the power of heat rather than relying on harsh chemical agents. For the vast majority of ceramic and porcelain tile installations, a steam mop is not only safe but highly recommended. The high temperature steam works by loosening the molecular bond between the tile surface and the accumulated oils or dirt. This allows for deep cleaning without the need for aggressive scrubbing or abrasive pads.
However, a degree of caution is necessary. While the tile itself is heat resistant, you should always check with your manufacturer regarding the grout and any sealers that have been applied. In some instances, excessive or concentrated heat can cause certain low quality grout sealers to peel or degrade. When using a steam mop, the best practice is to keep the device moving steadily across the floor. Hovering over a single spot for too long can trap moisture and heat in a way that might stress the adhesive bond underneath the tile.
In the kitchen, where grease and food particles are common, a steam mop serves as an excellent degreaser. It can break down fats and oils that a standard mop would merely spread around the room. To achieve the best results, always begin with a clean, fresh microfiber pad on your steam mop. Using a dirty pad will result in streaking and can leave a cloudy film on the tile surface. When used correctly, steam is one of the most efficient ways to sanitize your home.
3. How Do You Clean Ceramic and Porcelain Tile Effectively?
Effective cleaning does not necessarily require expensive specialty products or complex chemical formulas. In fact, many of the most effective solutions are found in a simple mix of warm water and a mild, pH neutral detergent. To begin, mix a small amount of floor cleaner into a large bucket of water. It is a common misconception that more soap equals a cleaner floor. In reality, using too much soap creates a sticky film that dulls the finish and attracts dirt more rapidly.
A microfiber mop is the preferred tool for applying this solution. Microfiber is uniquely engineered to trap and lift particles rather than pushing them into the grout. If you encounter a particularly stubborn spot, gentle agitation with the mop head is usually enough. While porcelain is incredibly dense and scratch resistant, you should still avoid steel wool or metal scouring pads, as these can leave metal marks or mar the glaze over time.
For homeowners who prefer a natural approach, a diluted solution of white vinegar and water can be effective for cutting through hard water deposits and mineral buildup. However, vinegar is acidic and should be used with moderation. Over time, frequent use of acidic cleaners can etch certain types of grout or wear down protective sealers. If you choose to use vinegar, ensure it is heavily diluted and followed by a thorough rinse with plain water.
4. What is the Most Effective Way to Clean Floor Tile Grout?
Grout is frequently the first part of a tile floor to show signs of wear and discoloration. Because grout is a porous material, often composed of cement and sand, it absorbs liquids and traps microscopic grime far more easily than the tile itself. If your grout lines are looking dark or stained, a targeted cleaning approach is necessary. One of the most effective home remedies is a paste made from baking soda and a small amount of water.
Apply this paste directly to the grout lines and allow it to sit for approximately ten to fifteen minutes. This dwell time allows the baking soda to lift the dirt to the surface. Afterward, use a dedicated grout brush or an old toothbrush to scrub the lines. This specific tile cleaning technique can dramatically brighten the appearance of the entire room, making the floor look as though it was just installed.
For extreme staining that baking soda cannot resolve, a very diluted bleach solution can be considered, but it should only be used on white grout. Bleach can cause permanent discoloration on colored or tinted grout and may damage the surrounding tile if not handled carefully. Once the scrubbing is complete, it is essential to rinse the area with plenty of clean water. Leaving any cleaning residue in the grout will only lead to faster re-soiling.
5. Should You Sweep or Vacuum Before You Mop?
One of the most frequent mistakes in floor maintenance is the decision to mop a floor that has not been properly swept or vacuumed. You must always remove loose debris before introducing moisture. If you skip this critical step, the water from the mop will mix with the dust and hair to create a thin layer of mud. Instead of cleaning the floor, you will simply be spreading a diluted slurry of dirt across the entire ceramic surface.
A high quality vacuum is generally more effective than a traditional broom because of its ability to pull debris out of the recessed grout lines. This sequence is considered the best way to clean tile because it protects the integrity of the finish. Small grains of sand or grit can act like sandpaper under the weight of a mop, causing micro scratches that dull the shine of your floor tile over time.
By dedicating five minutes to a thorough sweep or vacuum, you make the actual mopping process significantly faster and more effective. This preparatory work ensures that the mop can focus on its primary job: removing bonded oils and sanitizing the surface. Professional cleaners always emphasize that the dry stage of cleaning is just as important as the wet stage.

6. How Can You Remove a Stubborn Stain from Porcelain Tile Floors?
Porcelain tile is prized for its high density and low moisture absorption rate, but it is not entirely immune to staining. If you find a mark that standard mopping cannot remove, you must first identify the nature of the stain to choose the correct countermeasure. For grease based stains or oily residues, a commercial alkaline degreaser is usually the most effective option. Apply the cleaner to the spot, let it sit for a few minutes to break down the oils, and then scrub with a soft brush.
For organic stains such as coffee, tea, or fruit juice, a mixture of hydrogen peroxide and a few drops of ammonia can be used. This solution acts as a mild bleach that targets the organic pigments. It is vital to rinse the area with fresh water after using any chemical treatment to prevent a sticky film from forming. Sticky residues are the primary cause of rapid re-staining in specific spots.
If a stain has managed to permeate the grout, you may need a more aggressive grout cleaner. Once the area is clean and completely dry, it is highly recommended to apply a high quality grout sealer. This sealer acts as a barrier, preventing future spills from soaking into the pores of the grout. Understanding how to treat these specific blemishes will help you maintain the flawless look of your porcelain tile for years.

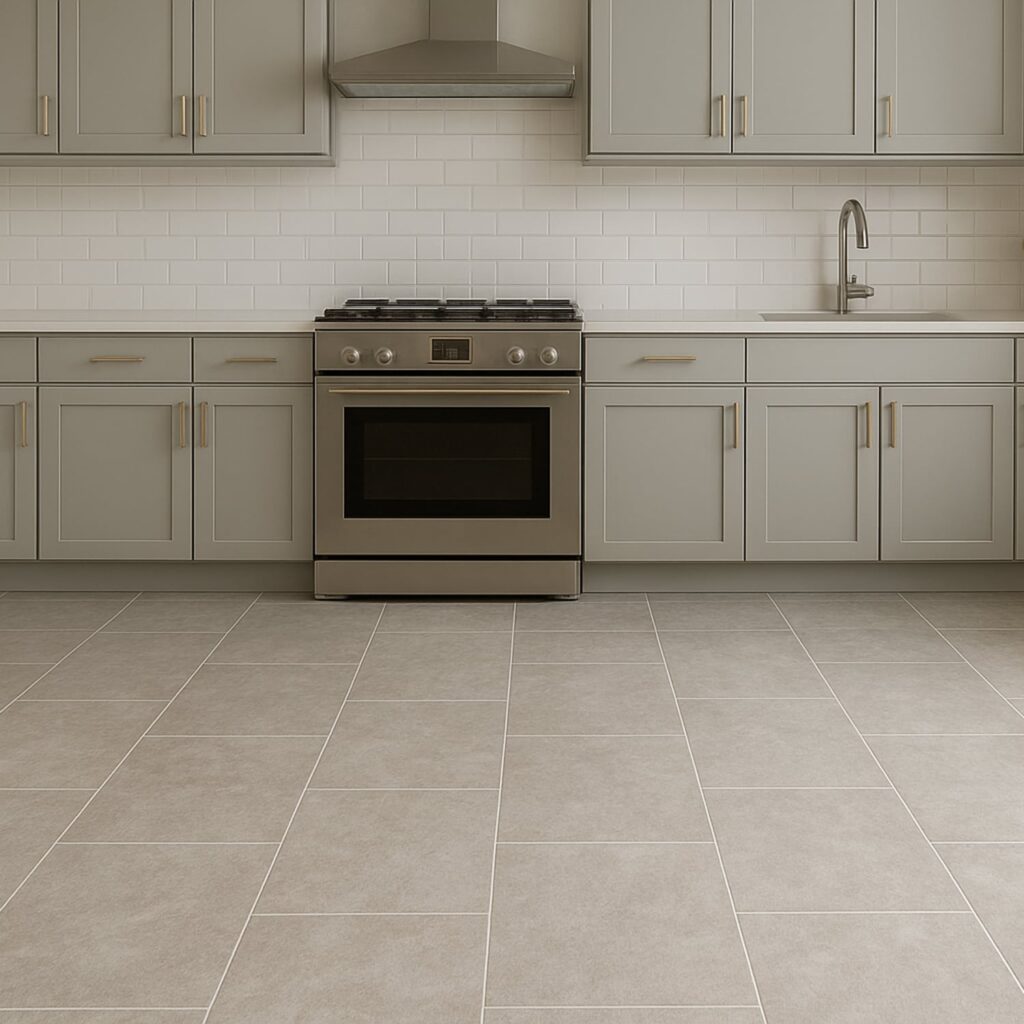
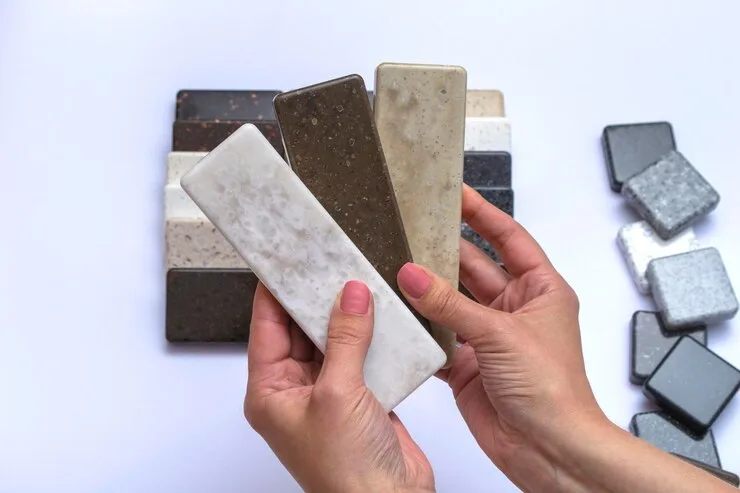
7. What are the Different Types of Tile and Their Cleaning Needs?
Not all tiles are created equal, and understanding the differences between ceramic and porcelain is key to proper care. Ceramic tile is generally made from red or white clay and fired in a kiln. It is slightly more porous than porcelain, meaning it might require more frequent sealing and careful attention to spills. Porcelain tile is a specialized subset of ceramic, fired at much higher temperatures and made from denser clay, which makes it nearly waterproof and extremely durable.
Natural stone tiles, such as marble, granite, or travertine, require an entirely different cleaning philosophy. Unlike ceramic or porcelain, natural stone is highly sensitive to acids. Using vinegar or common bathroom cleaners on marble can cause permanent etching and loss of shine. For stone, you should only use cleaners specifically labeled as stone safe and pH neutral.
The texture of your tile also dictates your cleaning tools. A smooth, polished porcelain tile is easy to clean with a flat microfiber mop. However, a textured or “anti slip” tile has small ridges and valleys that can trap dirt. These surfaces often require a string mop or a brush with longer bristles to ensure that the cleaning solution reaches into the texture. Always consult the manufacturer’s guidelines to ensure you are using products that are compatible with your specific flooring.
8. Why Does My Tile Floor Still Look Dirty After Mopping?
It is a common frustration to spend time mopping only to find that the floor looks hazy or streaky once it dries. The most frequent cause of this is known as “dirty water syndrome.” If you do not change the water in your bucket as soon as it becomes cloudy, you are essentially washing your floor with liquid dirt. As the water darkens, it loses its ability to hold more soil, and instead, it starts redepositing grime into the grout lines and onto the tile surface.
Another common culprit is the overuse of cleaning products. When too much soap is used, it leaves behind a surfactant film. This film is not only dull to the eye but is also slightly tacky, meaning it will grab onto new dust immediately. If your floor feels sticky or looks hazy, try performing a “rinse mop” using nothing but hot water. This will help strip away the accumulated soap residue and restore the original luster of your ceramic tile.
Finally, the quality of your tap water can play a role. If you live in an area with hard water, the minerals in the water can leave behind white spots or a chalky film as the floor dries. In these cases, using a small amount of water softener or even distilled water for the final rinse can produce a much cleaner result. Consistent maintenance with a focus on clean tools is the secret to a streak free finish.
9. Is it Better to Use a Traditional Mop or a Microfiber Mop?
The tools you select are the foundation of your cleaning routine. The traditional cotton string mop has been a staple for decades, primarily because it can hold a large volume of water. However, for modern tile floors, the string mop is often counterproductive. The heavy, wet strings tend to push dirty water into the recessed grout lines, where the dirt settles and stays. Furthermore, string mops are difficult to clean thoroughly, often harboring bacteria between uses.
A microfiber mop is widely considered the superior choice for tile floor cleaning. Microfiber is a synthetic material where each fiber is split into tiny strands, creating a massive surface area that physically grabs and holds onto dirt and bacteria. These mops require significantly less water, which is a major advantage. Less water means the floor dries faster, reducing the risk of slips and preventing excess moisture from sitting on the grout.
Microfiber pads are also highly hygienic. They can be removed and laundered in a washing machine after every use, ensuring that you are not reintroducing old dirt to your clean floor. For larger homes, it is a good idea to keep several spare pads on hand. This allows you to switch to a fresh, clean pad halfway through the cleaning process, preventing the spread of grime and ensuring a consistently high level of cleanliness across all rooms.
10. How Often Should You Perform Deep Tile Cleaning?
While daily sweeping and weekly mopping are the pillars of floor care, they are not always enough to keep a floor in perfect condition. A deep tile cleaning should be scheduled every three to six months, depending on the level of foot traffic in your home. This process involves a more intensive focus on the grout and a thorough scrubbing of the entire tile surface with a slightly stronger cleaning solution to remove any invisible buildup of oils or waxes.
During a deep clean, you should also perform a “water bead test” on your grout. Drop a small amount of water onto the grout line. If the water beads up and stays on the surface, your sealer is still intact. If the water soaks into the grout and turns it dark, the sealer has worn away, and it is time to reapply a protective coating. Maintaining a good seal is the best way to prevent permanent staining and make your weekly cleaning much easier.
Deep cleaning is also the ideal time to move heavy furniture and clean the areas that are usually hidden. Dust bunnies and debris that accumulate under sofas or cabinets can eventually migrate to the middle of the room, adding to the overall dirt load. By taking the time to perform this intensive care a few times a year, you preserve the value of your home and ensure that your ceramic tile floors remain as vibrant and beautiful as the day they were first installed.
Additional Strategies for Long Term Tile Preservation
Beyond the act of cleaning, there are several preventative measures you can take to keep your floors looking new. One of the most effective strategies is the use of walk off mats at every entrance to your home. These mats capture a significant percentage of the dirt, sand, and moisture that would otherwise be tracked onto your tile floors. By stopping the dirt at the door, you reduce the frequency and intensity of the cleaning required.
In the kitchen, placing a small rug or runner in front of the sink and stove can protect the tile from the most common sources of spills and grease. These rugs are much easier to wash than the floor is to scrub. Additionally, ensure that all furniture legs are equipped with felt protectors. Even though tile is hard, the constant movement of heavy chairs can eventually lead to scratches or chips in the glaze, especially if a piece of grit gets caught under a chair leg.
Environmental factors also play a role in floor health. High humidity can encourage the growth of mold or mildew in bathroom grout. Ensuring proper ventilation by using exhaust fans or opening windows can keep the air dry and prevent these biological issues from taking hold. A dry environment is a clean environment when it comes to tile and grout.
The Role of Professional Maintenance
Occasionally, despite your best efforts, a floor may reach a point where DIY methods are no longer sufficient. If the grout has become severely discolored or if the tile has a heavy buildup of old wax or improper cleaners, it may be time to consult a professional tile and grout cleaning service. Professionals use high pressure extraction systems and specialized chemicals that can restore a floor to near original condition.
Hiring a professional once every few years can be a wise investment. They can also apply professional grade sealers that last much longer than those available in retail stores. This deep restoration provides a clean slate, making your daily and weekly maintenance routines much more effective. However, for most homeowners, following the expert tips outlined in this guide will be more than enough to maintain a stunning floor indefinitely.
Summary of Best Practices for Sparkling Tile Floors
- Prioritize daily removal of loose dirt using a vacuum or soft bristle broom to prevent surface abrasion.
- Utilize microfiber mops for their superior ability to trap dirt and their hygienic, washable nature.
- Maintain grout health by using a baking soda paste and avoiding harsh acids that can etch the material.
- Avoid the common mistake of mopping with dirty water; change your cleaning solution frequently.
- Manage chemical usage carefully to prevent the buildup of a dulling soap film on the tile glaze.
- Protect your investment by applying grout sealer annually or whenever the water bead test fails.
- Act immediately on spills to prevent them from becoming permanent stains in the porous elements of the floor.
By integrating these habits into your home maintenance routine, you ensure that your ceramic and porcelain tile floors remain a highlight of your home’s interior design. Consistent, gentle care is always more effective than occasional, aggressive cleaning. With the right tools and a bit of knowledge, keeping your floors like new is a simple and rewarding task.